How to Install Vpn on Windows Server 2012 R2
How to install a VPN on Windows Server 2019 (3 easy steps)
Aleksandar's main passion is technology. With a solid writing background, he is determined to bring the bleeding edge to the common user. With a keen eye, he always spots the next big thing surrounding... Read more
- Windows Server 2019 supports VPN connections. But you have to go through a bit of trouble to set it up and allow VPN access to all users involved.
- Discover three easy steps for setting up a VPN on Windows Server 2019. You don't have to install any software tools since you can use the server's built-in settings.
- Need a fresh OS install? Download Windows Server 2019 right away!
- Join our VPN Troubleshooting Hub for additional guides.

Using a VPN on a Windows Server has a lot of advantages.
It allows users in a small environment to access remote clients or firewalls to Windows Server.
If you're here to discover the exact steps for installing a VPN on Windows Server 2019, here's everything you need to know.
BEST VPNS WITH BLACK FRIDAY DISCOUNTS
How can I set up a VPN on Windows Server 2019?
Install Remote Access using Server Manager
- Open Server Manager
- Go to Manage > Add Roles and Features Wizard
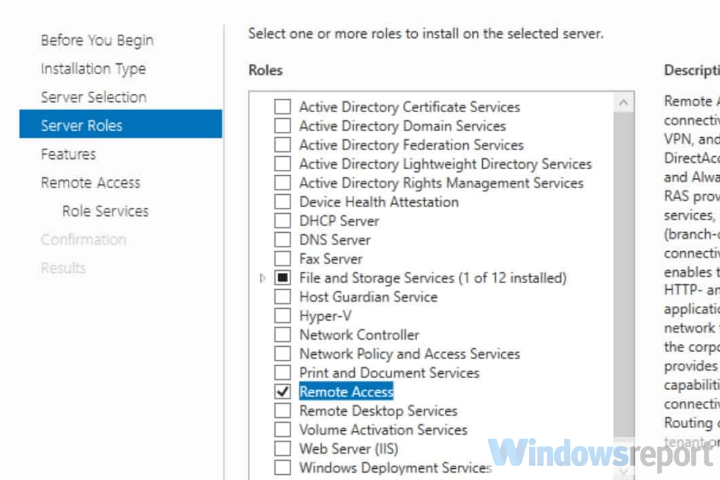
- Check the Remote Access box and click Next
- At Role Services, check the DirectAccess and VPN (RAS) box and click Next
- Click Install
- Once setup is over, you might have to restart the server
An alternative solution is to install and configure Remote Access using the PowerShell.
Set up the VPN
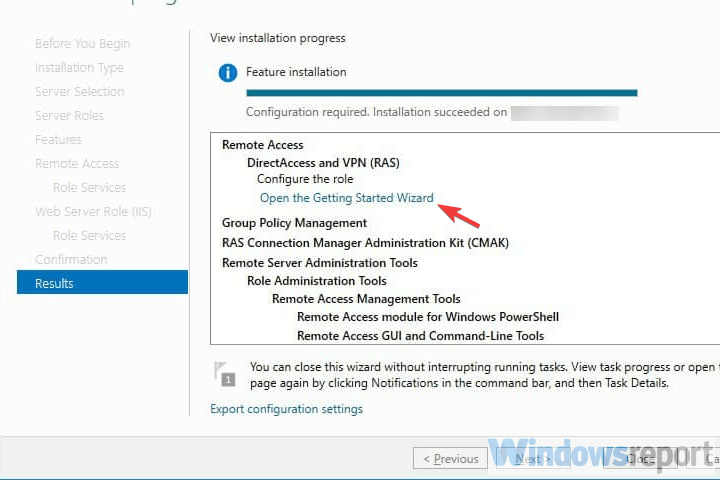
- Click on the Open the Getting Started Wizard
- Choose Deploy VPN only
- In the Routing and Remote Access Management Console,right-click on the Server name
- Select Configure and Enable Routing and Remote Accessfrom the context menu
- Choose Custom configuration and click Next
- Select VPN access
- Start the VPN service
You shouldn't stumble upon any issues at this stage if you use the dedicated wizard.
Configure VPN access
Finally, the only thing remaining is to configure the VPN User and Network Access. You have to open and forward ports from the firewall to the Windows Server.
Depending on the protocol you use, here are the ports you should open:
- For PPTP: 1723 TCP and Protocol 47 GRE (also known as PPTP Pass-through)
- For L2TP over IPSEC: 1701 TCP and 500 UDP
- For SSTP: 443 TCP
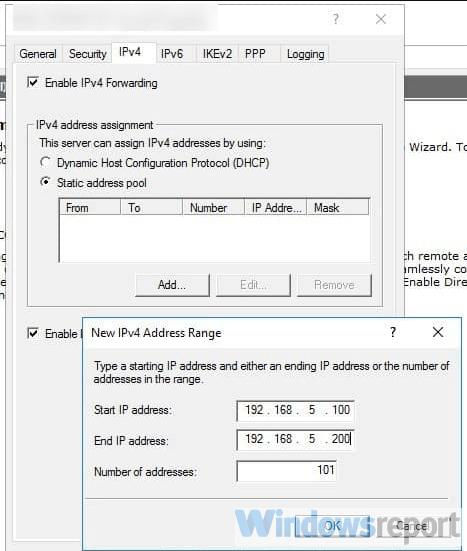
If you don't have a DHCP server, you can set a static IPv4 address pool. This can be done by following the steps below:
- Firstly, make sure all users have Remote access enabled
- Open the Properties panel of your VPN server
- Click on theIPv4 tab and enable Static address pool
- Click Add and add the same static IP address from the same Server subnet
In conclusion, you can install a VPN on your Windows Server 2019 in three easy steps: setting up Remote Manager using Server Manager or PowerShell, installing the VPN, and managing VPN access permissions.
If you experienced any technical difficulties, please let us know by dropping a comment in the section below.
Your connection is not secure - websites you visit can find out your details:
-

- Your IP Address:
34.73.163.103
Companies can sell this information, alongside your location and internet provider name, and profit from it by serving targeted ads or monitoring your data usage.
We recommend Private Internet Access, a VPN with a no-log policy, open source code, ad blocking and much more; now 79% off.
![]()
Newsletter
How to Install Vpn on Windows Server 2012 R2
Source: https://windowsreport.com/vpn-windows-server-2019/