How Do You Make a Cheese Cake Creamier
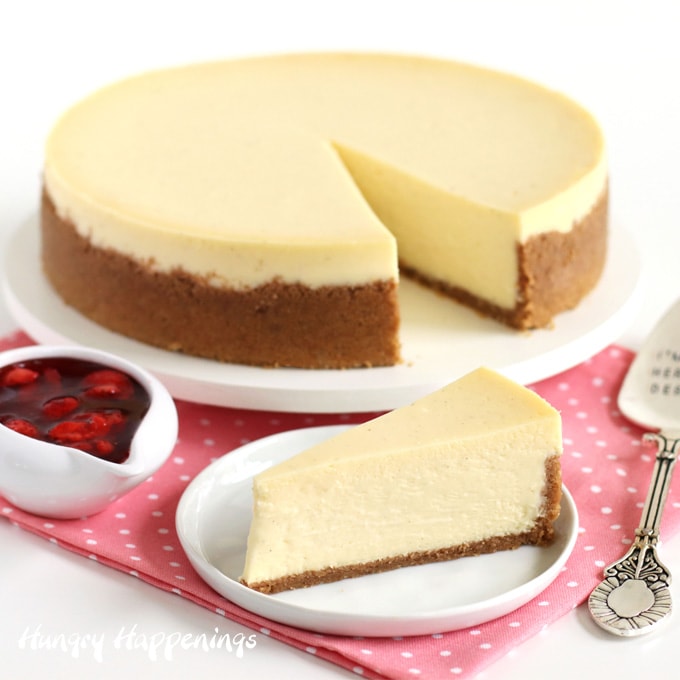
This classic cheesecake recipe creates a silky smooth, amazingly creamy, rich-tasting cheesecake.
It's a luxurious dessert that can be made at home and it rivals any cheesecake from a restaurant.
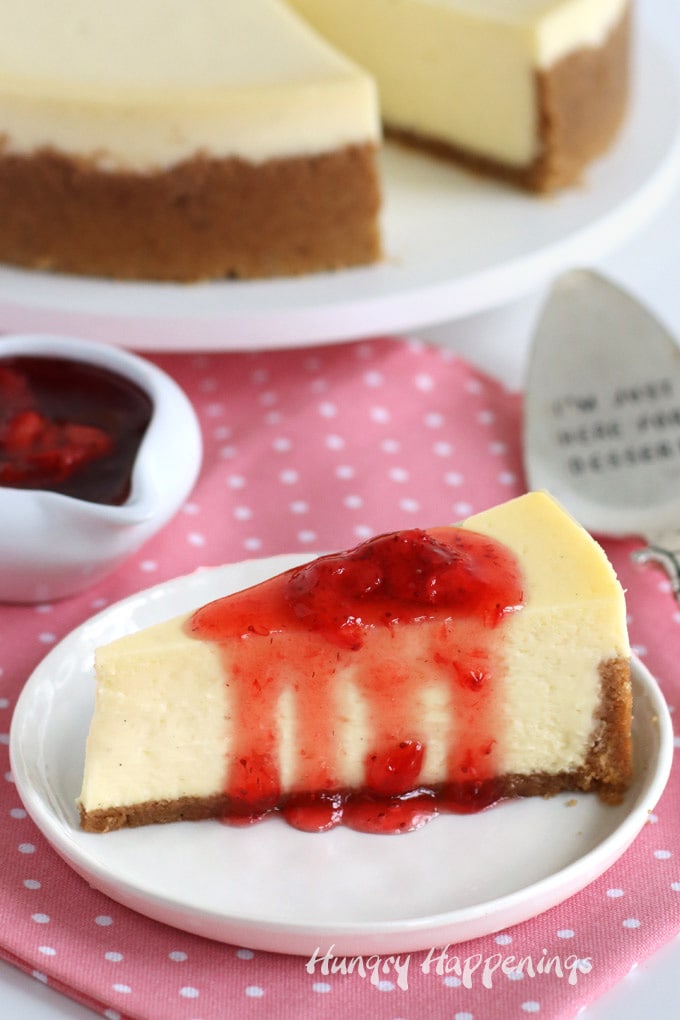
Enjoy a slice served plain or topped with chocolate ganache, strawberry sauce, or fresh berries and whipped cream.
How much do you love cheesecake? I'm typically a huge fan! When it's good, eating cheesecake is a divine experience. When it's bad, it's such a disappointment.
I've been served my fair share of dry and chalky cheesecake and I never make it past the first bite, but when a good piece of creamy cheesecake is put in front of me I cannot resist licking my plate clean.
Years ago, I discovered the secrets to making the best cheesecake ever and I'm going to share those tips with you in this tutorial.
Since starting this blog, I've shared dozens of decorated cheesecake ideas with you using my favorite cheesecake recipe but I've never shared the recipe to make plain vanilla or vanilla bean cheesecake.
When I began creating recipes for Hungry Happenings, my goal was to share the most creative and unique desserts that were festively decorated for holidays and special occasions.
But, over the years, I've gotten a lot of questions about basic baking techniques, so I felt it was time to share my recipe to make this classic cheesecake. As I experimented with this recipe, I even learned a few tricks to make my cheesecakes even better.
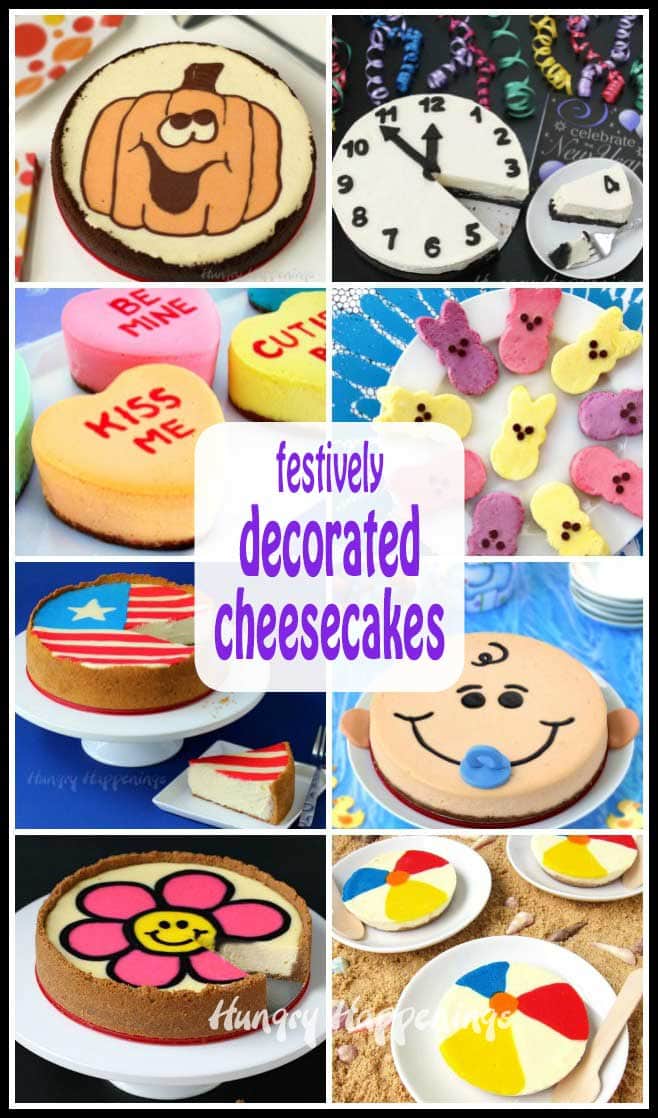
Once you master the basics then you can make these fun special occasion cheesecakes.
- Naturally-colored Happy Jack 'O Lantern Cheesecake
- New Year's Eve Countdown Clock No-Bake Cheesecake
- Conversation Heart Cheesecakes
- Peeps Mini Cheesecakes
- Fourth of July Cheesecake
- Baby Shower Cheesecake
- Daisy Cheesecake
- Mini Beach Ball Cheesecakes

Video
Watch the video to see how to make the Best Cheesecake Ever!
Cheesecake Ingredients
CRUST
- graham crackers
- You will need about 1 cup of graham cracker crumbs for an 8-inch cheesecake and 1 1/2 cups of crumbs for a 9-inch cheesecake.
- I recommend crushing whole graham crackers instead of buying graham cracker crumbs as boxes of crumbs typically taste a bit stale in my opinion.
- 8 whole rectangle crackers or 16 squares will yield just a smidge more than than 1 cup of crumbs and 12 whole crackers will yield about 1 1/2 cups of crumbs.
- sugar
- Adding a bit of granulated sugar to a graham cracker crust helps with browning and adds structure and flavor.
- butter
- Butter not only adds flavor to the crust but also helps to hold the crust together.
- optional, cinnamon
- If you enjoy a slight cinnamon flavor, you can add a dash of cinnamon to your graham cracker crust.
CHEESECAKE FILLING
- cream cheese
- Use softened full-fat cream cheese for the best flavor and texture.
- I always use Philadelphia Cream Cheese to make my cheesecakes. I think it has the best flavor and texture.
- sugar
- I like to use Dixie Crystals Extra Fine Granulated Sugar to make my Philadelphia cheesecakes. The extra-fine sugar dissolves more easily into the cream cheese. Regular granulated sugar works fine too.
- sour cream
- Sour cream adds a nice tang to the cheesecake plus it helps to keep the cheesecake super creamy.
- eggs
- Use room temperature large eggs. I prefer using farm-fresh eggs or Egglands Best Eggs. I think they add a richer flavor to the batter.
- vanilla
- I prefer using vanilla bean paste over vanilla extract as it adds flecks of vanilla bean into my cheesecake and gives the filling a more pronounced vanilla flavor.
- Vanilla extract will work fine though too, just be sure to use pure vanilla extract for the best flavor.
- You can also use a vanilla bean, by scraping the seeds out of the pod and mixing them into the filling.
- optional, lemon juice
- If you like a bit more tang in your cheesecake, you can add 1 1/2 teaspoons of freshly squeezed lemon juice to brighten up the flavor. I leave it out, as I prefer the vanilla flavor to shine through.
Cheesecake Pan
Traditional cakes are flipped out of their pans once baked. You cannot flip a cheesecake out of a pan without damaging the top unless it is frozen solid. So, you need to bake cheesecakes in springform pans with removable sides.
- springform pan
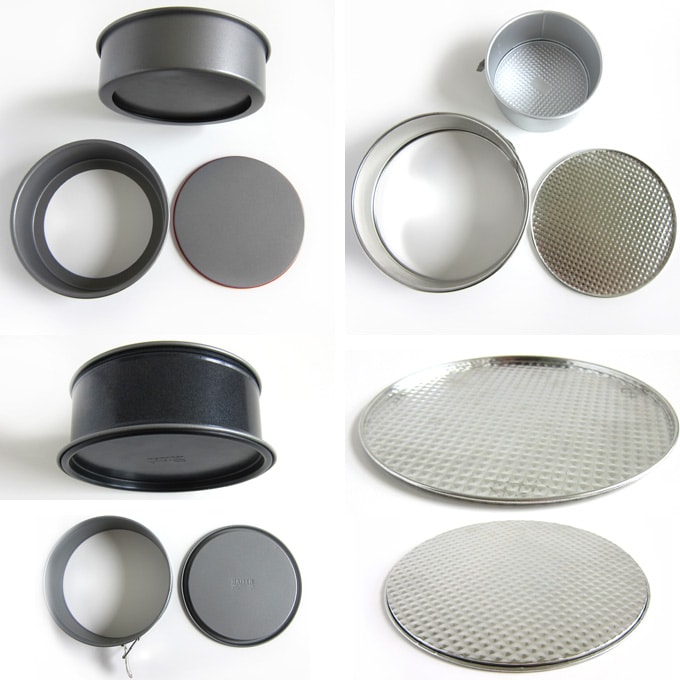
- A springform pan has a round base and removable sides that typically clamp closed to keep the cheesecake filling in while baking but slide open to allow easy removal of the baked cheesecake.
- A Push-Pan (pictured top left) has a flat base that slides up and down in the metal ring with the help of a silicone gasket. If you bake a cheesecake in a Push-Pan you simply push the base up until the cheesecake pops out.
- I prefer to use springform pans with a flat base without a lip around the edge like the Push-Pan or a Kaiser Springform Pan (pictured bottom left) or Nordic Ware Leakproof Springform Pan, so I can easily remove the cheesecake and place it on a serving platter. But traditional springform pans (pictured top right) have a lip around the edge, so I recommend flipping the base upside down so you have a smooth surface on which to make your cheesecake crust. See the pictures in the bottom right. The top image shows the lip. The bottom image shows the base flipped upside down.
- Springform pans are available in a variety of sizes from 4-inch all the way up to 12-inch. They are even available in square, rectangle, and heart shapes.
- The most common are 8-inch and 9-inch round pans. It's important to adjust the recipe when using different-sized pans. I give you the quantities and baking times for both of these pans in the recipe below.
What makes cheesecake creamy?
- Creamy ingredients.
- That's already covered. Cream cheese and sour cream blended with sugar and eggs make a very creamy cheesecake.
- Now, it's important that you treat these creamy ingredients correctly so that you end up with a smooth cheesecake.
- Room Temperature Ingredients.
- You want to make sure you blend together room-temperature ingredients for the smoothest filling.
- If you try to blend cold cream cheese, you will have to whip it for a long time, which will add in too much air.
- If any of the ingredients are cold, they can cause the other ingredients to clump causing lumps in your cheesecake.
- It's imperative that you set your cream cheese, sour cream, and eggs out at room temperature for at least 1 hour, preferably 2, before you begin making your filling.
- You can speed up this process by cutting your cream cheese into small slices and setting them in your mixing bowl, warming your eggs (in their shell) in a bowl of hot tap water for 5 minutes (then remove and let sit on the counter), and by spreading your sour cream into a thin layer in a large shallow bowl.
- Scraping the bowl often.
- To ensure you don't have lumps of unmixed ingredients, you will need to scrape your bowl often.
- I've used hand-held mixers, a Kitchen Aid stand mixer, and a Nutri-Mill Artiste Stand mixer to make this cheesecake recipe, and no matter which mixer I use, I have to thoroughly scrape the bowl several times while mixing the cheesecake filling to ensure my filling is smooth and lump-free.
- Baking your cheesecake in a water bath.
- This is a must if you want the very best cheesecake with a silky smooth texture.
- We'll talk about this in more detail below.
- Allowing the cheesecake to cool slowly.
- It's best to gradually cool your cheesecake so the top remains nice and flat and crack-free.
- You'll bake your cheesecake in a 325 degree Fahrenheit oven, then allow it to cool slowly in the oven with the heat turned off before setting it on the counter at room temperature for an hour, and finally chilling it in the refrigerator for at least 4 hours.
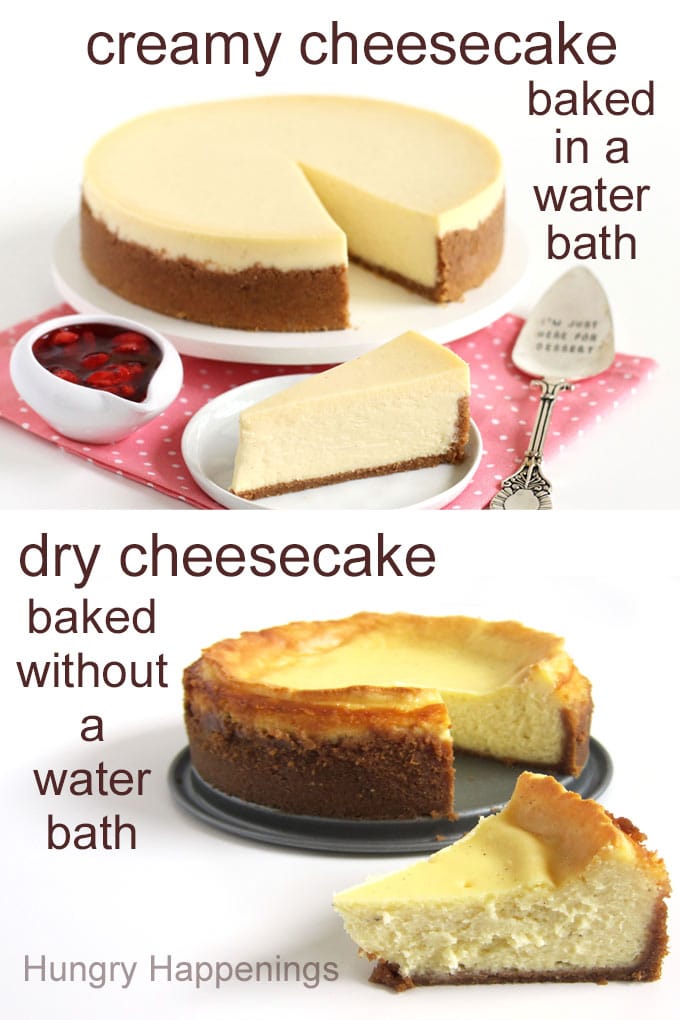
Water Bath versus No Water Bath
The cheesecakes pictured above were made using the exact same recipe.
The only difference is that the cheesecake pictured at the top that looks beautiful, tasted amazing, and was creamy and smooth was baked in a water bath.
While the cheesecake pictured on the bottom that is cracked, sunken, and dried out was baked in a dry oven without a water bath. Not only did it have a dry, chalky texture, but it also had an overly eggy flavor. It was not inedible, it just wasn't good enough to waste the calories!
Why won't my cheesecake set?
When you don't bake your cheesecake in a water bath the edges of the cheesecake bake too quickly while the center remains wet. If you pull your cheesecake out of the oven too soon because the edges have browned too much or begin to crack, the center will be soupy.
It will continue to set as it cools but it may never firm up completely even after chilling in the refrigerator.

See the recipe to make this Eagle Scout Cheesecake, here.
What is a water bath?
- A water bath, also known as a bain-marie, is a method of baking a custard, flan, creme brulee, flourless chocolate cake, or cheesecake in a springform pan or ceramic dish surrounded by water to ensure gentle baking.
- It's easy to create a water bath by setting your cheesecake pan inside a larger pan (like a 12-inch round cake pan or a roasting pan) then filling in between the two pans with boiling water.
Why should cheesecake be baked in a water bath?
- When a cheesecake is baked in a water bath it bakes evenly creating a creamy texture and a smooth surface.
- You'll bake your cheesecake in a low oven, at 325 degrees Fahrenheit, but the water which surrounds the outer edge of the cheesecake will never exceed 200°F, thereby allowing the entire cheesecake to bake evenly.
- The steam from the water will also help the cheesecake rise evenly which reduces cracks.
- A cheesecake that is not baked in a water bath will bake unevenly creating a dry or cracked cheesecake.
- The edges of a cheesecake baked without a water bath will rise and bake quickly. By the time the center of the cheesecake bakes through, the edges will have become tough, dry, cracked, or even burnt causing the gooey soft center to sink.
- Worse yet, the eggs can curdle making the texture of a cheesecake that's baked without a water bath chalky.
- Oddly enough, baking a cheesecake without a water bath even affects the flavor, making the egg flavor much more pronounced. People who tasted my cheesecake that was baked in a dry oven commented that it tasted like fried eggs.
How to prevent the water from leaking into the springform pan?
- The only problem with baking a cheesecake in a water bath is that water can leak inside your springform pan making your graham cracker crust soggy, so bakers typically wrap their springform pans with heavy-duty tin foil in hopes of avoiding leaks. See the picture above of the Eagle Scout cheesecake where I wrapped my pan in foil.
- Unfortunately, that is not foolproof. Using a Push-Pan or leakproof pan works much better to avoid leaking, but no pan is completely leakproof.
- Not only can water leak through the folds in the tin foil, but the steam will build up and collect inside the tin foil.
- There is a solution to this problem!
- You can set your springform pan inside a larger cake pan (that's as close to the same size as possible) or inside a silicone Easy Bath Cheesecake Wrap.
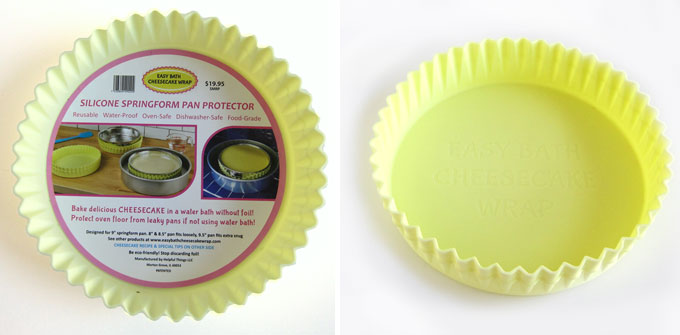
Easy Bath Cheesecake Wrap – Perfect Solution to Leakproof Baking!
I LOVE the Easy Bath silicone springform pan wrapper. It's basically a 9-inch silicone pan that you set your springform pan into. Then you pour the water in between the silicone pan and the larger outer pan. It keeps the springform pan from touching the water but sits close enough to the springform pan that it still allows the water bath to do its work.
My friend gave me one for my birthday this year and I used it for the first time to bake the cheesecake for this post and I will never bake a cheesecake without it again!

A note about discolored pans.
Baking a cheesecake in a water bath is a must if you want a creamy cheesecake without cracks, but just be aware that whatever pan you use to fill your water bath will probably discolor, particularly aluminum cake pans (my non-stick roasting pan discolored as well). It doesn't hurt the pan's usefulness, it just looks ugly.
If you wrap tin foil around your springform pan the tin foil will probably discolor as well.
That's another wonderful thing about the silicone mold. It looks the same when it comes out of the oven. Now, if someone would make a really sturdy 12-inch round silicone pan I'd have the perfect cheesecake-baking set to use. Sadly the sides of most silicone pans are not sturdy enough to hold a lot of water in place and would be impossible to remove from an oven when filled with water.
So let's bake a cheesecake!
Step1: Preheat your oven to 325° F.
Step 2: Prep your pan.
- If your base has a lip around the edge, turn it upside down and clamp the ring around it.
- Brush the inside of the springform pan ring with butter or spray with non-stick baking spray.
- Optional, line the base with a round of parchment paper. This will allow for easier removal from the pan so you can move the cheesecake onto a serving plate.
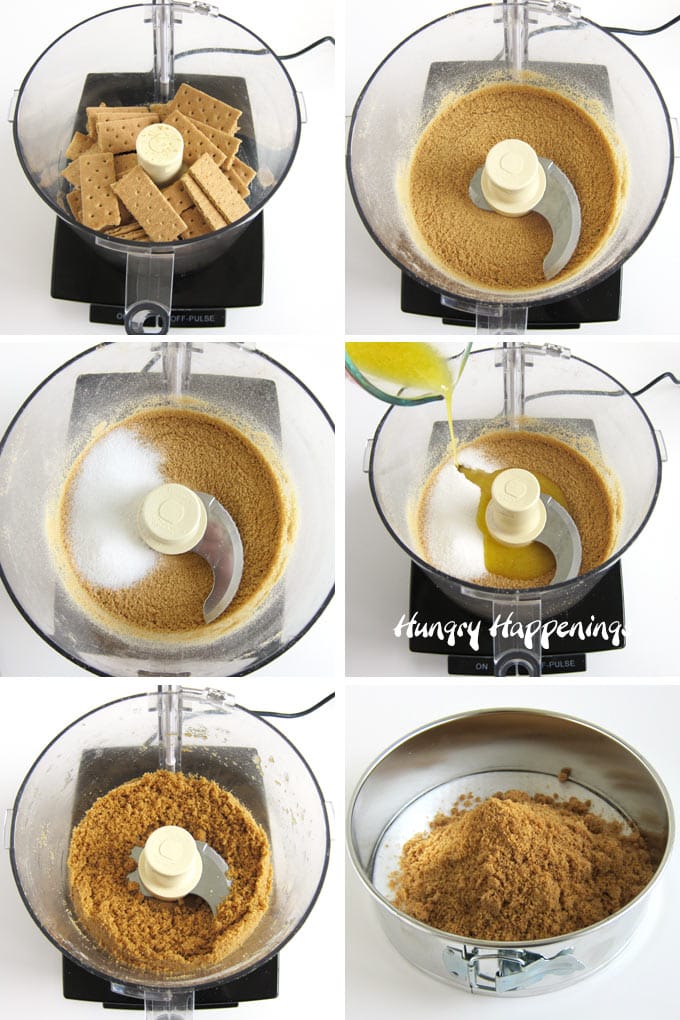
Step 3: Make the graham cracker crust.
- Crush your graham crackers into fine crumbs using a food processor (or by placing them in a zip-top bag and smashing them with a rolling pin or skillet).
- Add the sugar, melted butter, and cinnamon if using.
- Blend until the crumbs resemble wet sand.
- Pour into a springform pan.
Alternatives to graham crackers:
- You can use any cookies including OREO Cookies, Nutter Butter Cookies, Biscoff Cookies, and even animal crackers to make your crust.
- Just crush the cookies and measure out 1 cup of crumbs for an 8-inch cheesecake or 1 1/2 cups of crumbs for a 9-inch cheesecake.
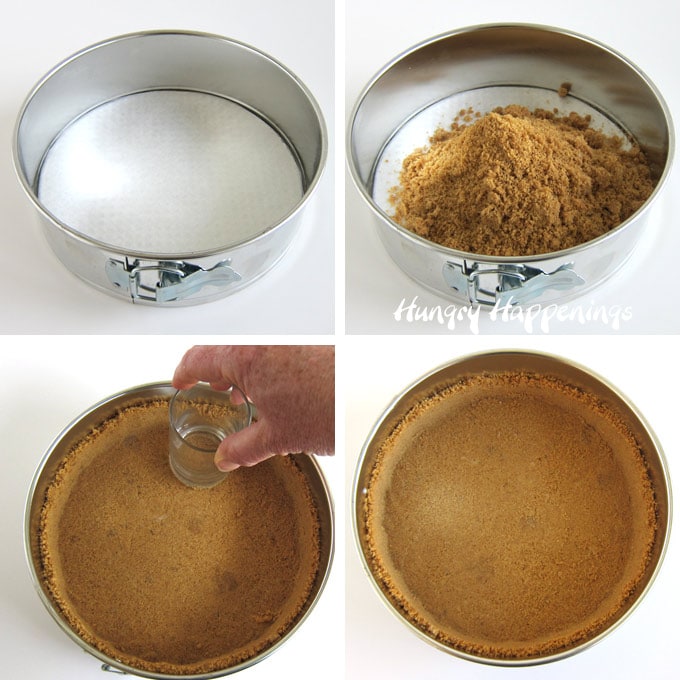
Step 4: Form the crust in the pan.
- Use a flat-bottomed glass or measuring cup to push the graham cracker crust mixture over the bottom and up the sides of the pan.
- Tap down using the glass to compact the crumbs.
- Push the crumbs up at least 2 inches around the edge of the pan. If you want a thinner edge, you can go even higher.
- Bake the crust in a preheated 325 degree F oven for 10-12 minutes until fragrant and slightly golden.
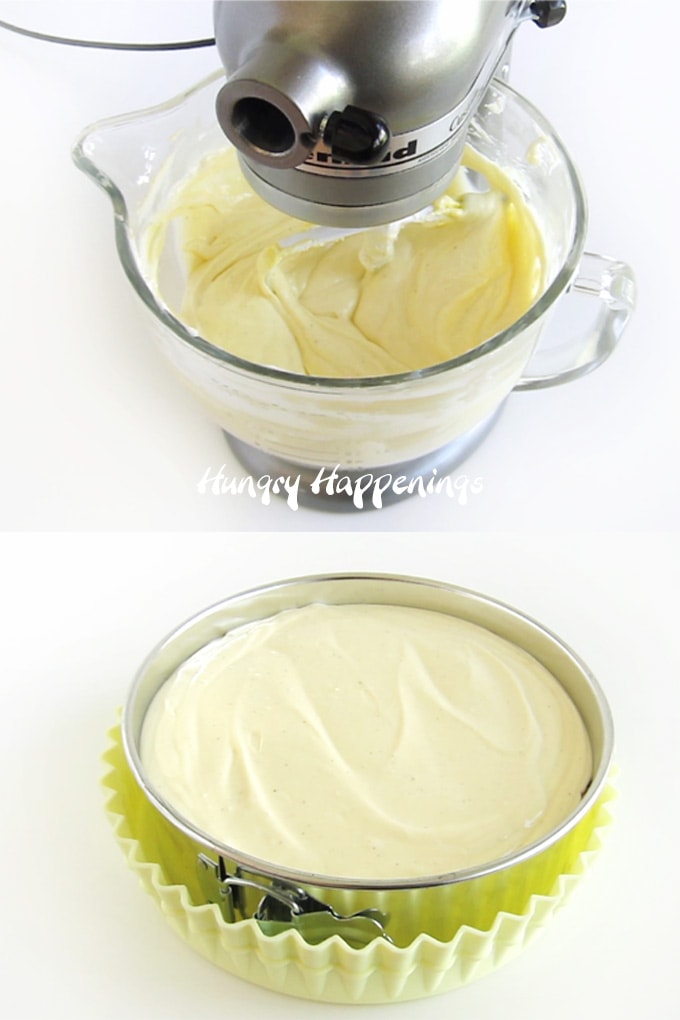
Step 5: Make the cheesecake batter.
- Beat the cream cheese on low speed until creamy, about 1 minute.
- Scrape the bowl and beaters then beat for another 30 seconds.
- Add the sugar and beat on medium-low until creamy and smooth about 1 minute.
- Scrape the bowl then add the sour cream and beat until combined.
- Scrape down the bowl again then beat just to ensure all of the lumps are removed.
- Lightly whisk the eggs, just to break them up.
- With the mixer running at low speed, slowly drizzle in the eggs until they are all incorporated into the cheesecake filling.
- Alternatively, you can leave the eggs whole and incorporate one egg at a time until blended.
- Do not overmix or incorporate a lot of air into the filling.
- Scrape down the bowl one last time and mix for a few seconds.
- Pour into your cooled cookie crust.
TIPS:
- Do not overmix the filling once you add the eggs or you will incorporate too much air into the filling which can cause your cheesecakes to rise too much then fall as it cools.
- Be sure to get all the lumps smoothed out before adding the eggs so you don't have to mix it too much at that point.
- If you find you have a lot of lumps in your finished batter, you can push the filling through a fine-mesh strainer to remove them.
- If the filling seems to have a lot of air bubbles, tap the mixing bowl on the counter a few times to allow them to come to the surface and pop.
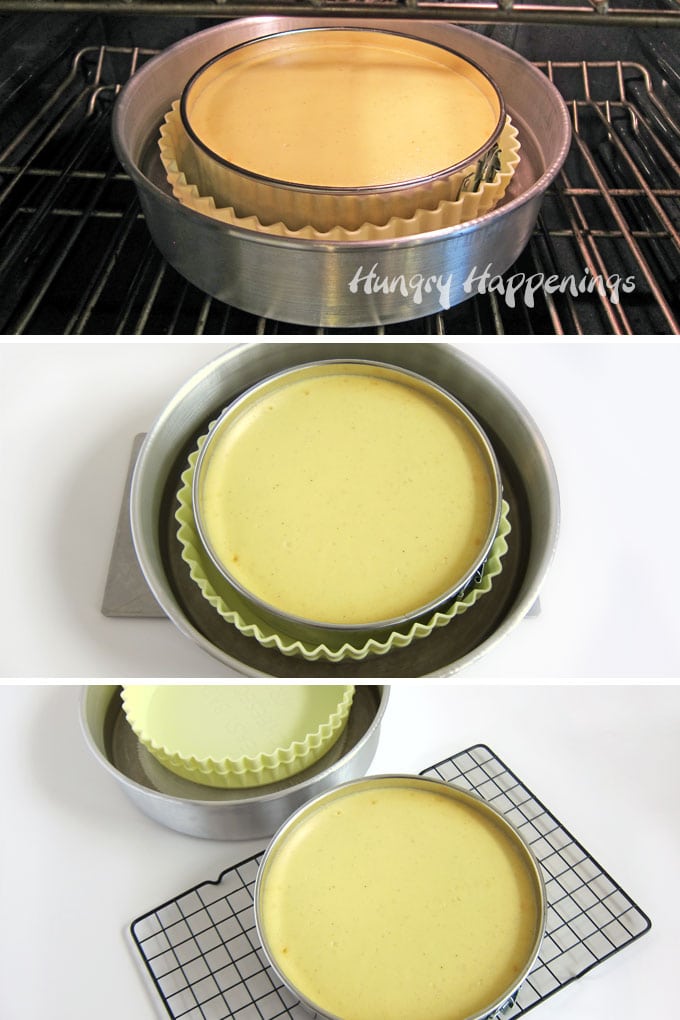
Step 6: Bake your cheesecake in a water bath.
- Bring at least 4 cups of water to a boil if using a 12-inch round cake pan for your water bath. If using a roasting pan you'll need up to 10 cups of water.
- Set your roasting pan or a large 12-inch round cake pan on the middle rack of your oven.
- Place your filled springform pan inside the Easy Bath Silicone Wrapper and set it into the larger pan in the oven.
- Carefully pour water in between the outer edge of the larger pan and the silicone Easy Bath wrapper.
- Close the door of the oven and bake for 45-50 minutes if making an 8-inch cheesecake or 50-55 minutes if baking a 9-inch cheesecake.
- Do not open the oven door during baking.
- When the top of the cheesecake looks set but not browned, turn off the oven and allow the cheesecake to begin cooling for 15 minutes.
- If after 15 minutes, the top of the cheesecake still looks wet, you can leave the door closed for a bit longer (up to another 45 minutes).
- If you aren't sure if it looks set, you can open the door and check the cheesecake by gently shaking the springform pan. The cheesecake should jiggle in the center but not look sloshy and wet. If it does look wet, close the oven door and keep it closed for the full 45 minutes.
- If the cheesecake looks set, then crack open the oven door about an inch, using a wooden spoon to prop it open if needed, and allow the cheesecake to continue cooling for 45 more minutes.
- Remove the cheesecake from the water bath and set it on a cooling rack.
- Run a thin knife or plastic blender spatula around the outer edge of the cheesecake if it hasn't retracted from the edge of the pan. This will also help to keep the cheesecake from cracking as it cools (which it shouldn't if it was baked in a water bath).
- Some cheesecakes only have a bottom crust. Not only do I like the look of the crust around the edge, but I also like that the crust helps to keep the cheesecake from sticking to the side of the pan.
- Let the cheesecake cool for an hour on the counter.
Using the silicone wrapper was so wonderful! I lifted the springform pan out of the silicone pan and did not have any water dripping like I do when I use a tin foil-wrapped pan.
My crust was nice and dry too!
Step 7: Chill in the refrigerator.
- Leave the cheesecake in the springform pan.
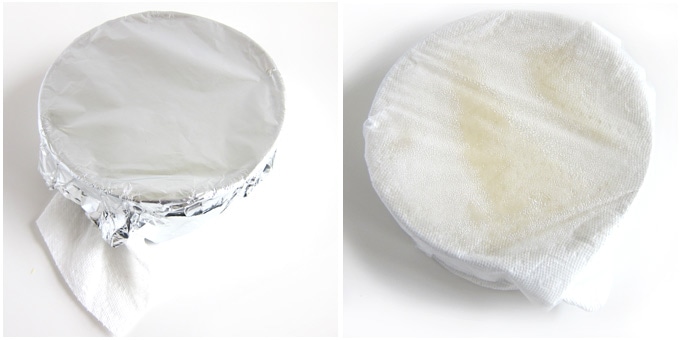
- Drape a paper towel over the top edge (not allowing it to touch the cheesecake) then wrap in tin foil or Glad Press 'n Seal.
- The paper towel will wick up the condensation that will form in the refrigerator.
- If you look at the picture on the right, you can see the beads of condensation that are trapped in between the paper towel and the Press 'n seal (the same thing happens with tin foil, you just can see it in the picture.)
- All of that moisture would be on the top of the cheesecake if the paper towel weren't there to absorb it.
- Or it could cling to the underside of the tin foil and leak down onto the cheesecake when you go to take it off.
Step 8: Cut the cheesecake and serve.
- Run a sharp knife under hot water then wipe it dry.
- Cut into the cheesecake.
- Wipe the knife clean and heat it with hot water again. (I fill a tall glass with hot water so I don't have to run water each time.)
- Cut out your first slice then repeat, cleaning the knife and reheating it with each cut. This will ensure you get beautiful slices to serve.
- Serve the cheesecake as is or add a delicious topping.
Topping Ideas:
- strawberry, raspberry, or blueberry sauce
- chocolate ganache
- homemade blueberry curd or lemon curd
- freshly made whipped cream
- fresh berries
- chocolate curls or shavings
- dulce de leche or caramel sauce
- ice cream toppings (strawberry, butterscotch, caramel, hot fudge)
Storing your cheesecake.
- Keep your cheesecake in the refrigerator for up to 4 days.
- I like to place the springform pan ring around the cheesecake then cover it with paper towels and tin foil or Glad Press 'n Seal to keep it fresh.
- Cheesecake will pick up strong food odors. If you have anything strong-smelling food in your fridge, I suggest you store your cheesecake in an airtight container instead.
Can I freeze cheesecake?
- You can freeze a whole cheesecake or slices of the cheesecake for at least 3 months just be sure it's well wrapped or sealed in an airtight container.
- I find it best to freeze whole cheesecakes in the pan. I cover it with a paper towel and wrap it with two layers of heavy-duty tin foil.
- If I need the pan for another use, or I want to freeze just a few slices, I place the cheesecake in an airtight container, drape paper towels over top, seal the lid tightly and freeze.
- Be sure to thaw the cheesecake in the refrigerator overnight.
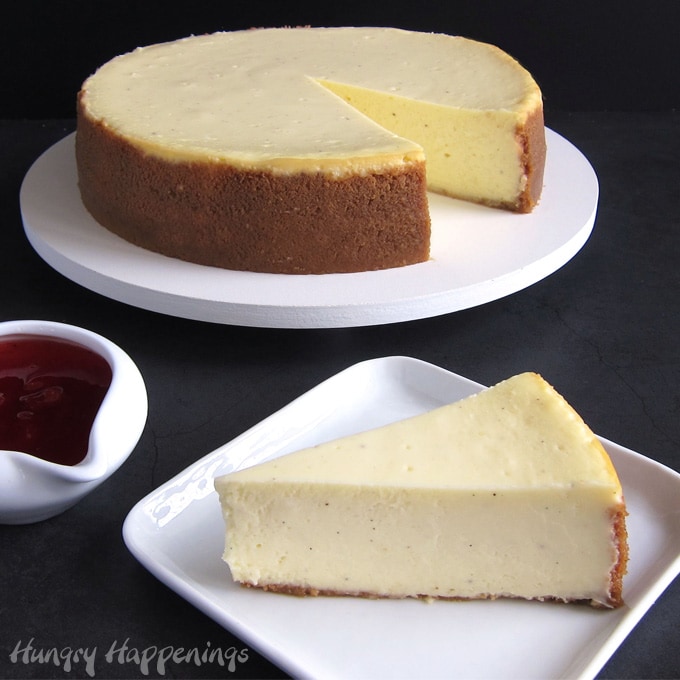
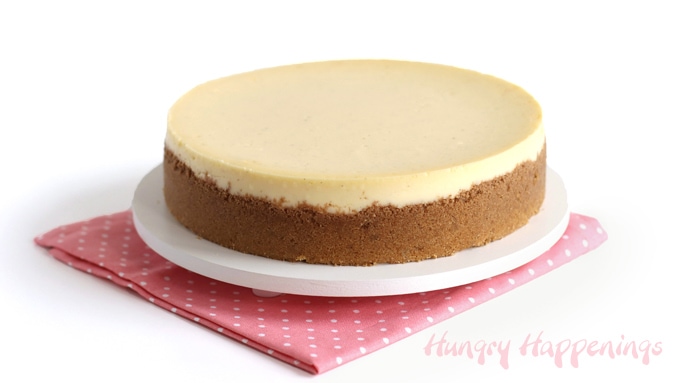
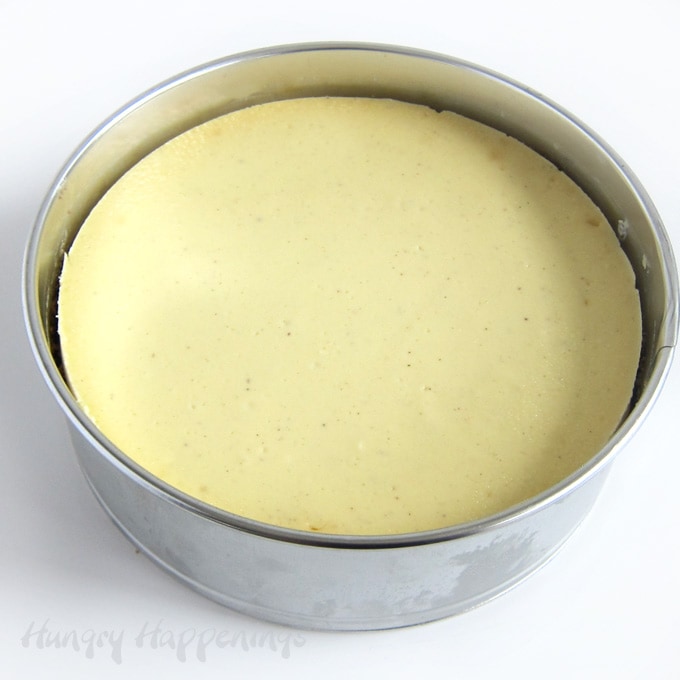
The cheesecake pictured above was baked in an 8-inch Push Pan in a water bath. I wanted to be sure I was giving you the correct ingredient amounts if you choose to use either an 8-inch or a 9-inch pan, so I baked several cheesecakes using various pans.
Notice the black flecks in the cheesecake? That is vanilla bean. I used vanilla bean paste to make all of my cheesecakes so they all have black flecks. If you want a pure off-white cheesecake or you plan to decorate it using colored cheesecake filling, be sure to use vanilla extract instead.
Printable Recipe

This classic vanilla cheesecake baked on a graham cracker crust is velvety smooth and decadently rich.
Course: Dessert
Cuisine: American
Keyword: cheesecake, classic cheesecake, vanilla bean cheesecake
Servings: 12
Calories: 539 kcal
8-INCH CHEESECAKE INGREDIENTS
Crust
- 8 whole graham crackers (about 1 cup of crumbs)
- 1 1/2 tablespoons sugar
- 4 tablespoons (1/2 stick) butter, melted
- optional, 1/8 teaspoon cinnamon
Cheesecake Filling
- 24 ounces (3 blocks) cream cheese, softened
- 1 cup sugar
- 3 large eggs, room temperature
- 1 cup sour cream, room temperature
- 1 teaspoon vanilla extract or vanilla paste
9-INCH CHEESECAKE INGREDIENTS
Crust
- 12 whole graham crackers (about 1 1/2 cups of crumbs)
- 2 tablespoons sugar
- 5 tablespoons butter, melted
- optional, 1/4 teaspoon cinnamon
Cheesecake Filling
- 32 ounces (4 blocks) cream cheese, softened
- 1 1/3 cup sugar
- 4 large eggs, room temperature
- 1 1/3 cup sour cream, room temperature
- 1 1/2 teaspoon vanilla bean paste or extract
-
Set your cream cheese, eggs, and sour cream out on the counter for at least one hour (preferably 2 hours) before making your cheesecake filling to allow the ingredients to come to room temperature.
-
Position an oven rack in the middle of your oven with no racks above it.
-
Preheat your oven to 325 degrees F.
-
If your springform pan has a lip around the edge, turn it upside down and lock it into place so the base is completely flat.
-
Grease the inner ring with butter or baking spray if your pan is not non-stick.
-
Optionally, you can line the bottom of your pan with a round of parchment paper.
Crust
-
Crush your graham crackers into crumbs, either using a food processor or by placing them into a zip-top bag and smashing them with a rolling pin.
-
Stir the graham cracker crumbs together with the sugar, melted butter, and cinnamon if using, until it resembles wet sand.
-
Pour into the bottom of a springform pan.
-
Push the crumbs over the bottom and about 2 inches up the sides of the pan, then press into an even layer using a flat-bottomed glass or measuring cup.
-
Bake the graham cracker crust for 10-12 minutes until fragrant and lightly browned.
-
Remove and let the crust cool while making the filling.
Cheesecake Filling
-
Beat the cream cheese on low speed until creamy, for about 1 1/2 minutes, scraping down the bowl and beaters after about 1 minute.
-
Scrape the bowl and beaters then add the sugar beat on medium-low speed until creamy and smooth about 1 minute.
-
Scrape the bowl then add the sour cream and beat until combined.
-
Scrape down the bowl again then beat just to ensure all of the lumps are removed.
-
Lightly whisk the eggs with a fork, just to break them up.
-
With the mixer running at low speed, slowly drizzle in the eggs until they are all incorporated into the cheesecake filling. This will take 45-60 seconds. (Alternately, you can mix in one whole egg at a time until blended.)
-
Do not overmix or incorporate a lot of air into the filling.
-
Scrape down the bowl one last time and mix for a few seconds.
Water Bath
-
Bring a kettle of water to a boil (or boil at least 4 cups of water in a large glass measuring cup in the microwave).
-
Pour the cheesecake filling into the pan over the cooled crust.
-
Set the springform pan into the Easy Bath Silicone Wrap or tightly wrap the bottom with a few layers of heavy-duty tin foil.
-
Set the filled springform pan in the larger 12-inch round cake pan or a large roasting pan.
-
Set the pans in the oven on the middle rack.
-
Carefully pour the boiling water into the larger pan so that it goes halfway up the side of the springform pan or about 3/4 of the way up the Easy Bath Silicone Wrapper. Close the oven door.
-
Bake an 8-inch cheesecake for 45-50 or bake a 9-inch cheesecake for 50-55 minutes until the top of the cheesecake looks set but not browned.
-
Turn the oven OFF and allow the cheesecake to continue baking for 15 minutes.
-
After 15 minutes, crack open the oven door about an inch (holding it open with a wooden spoon if needed) and allow the cheesecake to cool slowly for 45 minutes.
-
Remove the cheesecake from the oven and set it on a cooling rack.
-
Run a thin knife or plastic blender spatula around the edge to release the cheesecake from the pan.
-
If you used tin foil to wrap your springform pan, remove it.
-
Allow the cheesecake to cool at room temperature for an hour.
-
Drape a paper towel over the top of the springform pan (to wick up moisture), then wrap the pan with tin foil.
-
Place the cheesecake in the refrigerator for at least 4 hours.
-
Remove from the fridge and take off the tin foil and paper towel.
-
Unlatch the springform pan and remove the sides.
-
You can serve the cheesecake on the base of the springform pan or use a large cake spatula to carefully move it to a cake plate or serving platter.
-
Cut into 12 slices and serve plain or with your favorite toppings.
- The calories listed are for 1/12 of a 9-inch cheesecake.
- Store in the refrigerator for up to 4 days.
- Freeze for up to 3 months.
How can I make my cheesecake better?
12 Tips for making the best cheesecake
- Use room temperature ingredients.
- Add some sour cream to make a creamier cheesecake.
- Lightly whisk the eggs then stream them into the batter.
- Don't over mix the batter
- Add vanilla bean paste for a more robust vanilla flavor.
- Use a springform pan for easy removal of the cheesecake.
- Bake your cheesecake in a water bath.
- Use an Easy Bath Cheesecake Wrapper to leak-proof your springform pan.
- Allow the cheesecake to bake and cool slowly.
- Don't open the oven to check on the cheesecake.
- Let the cheesecake cool at room temperature for 1 hour before chilling in the refrigerator.
- Serve with delicious toppings like chocolate ganache or strawberry sauce.
More cheesecake recipes you might like…
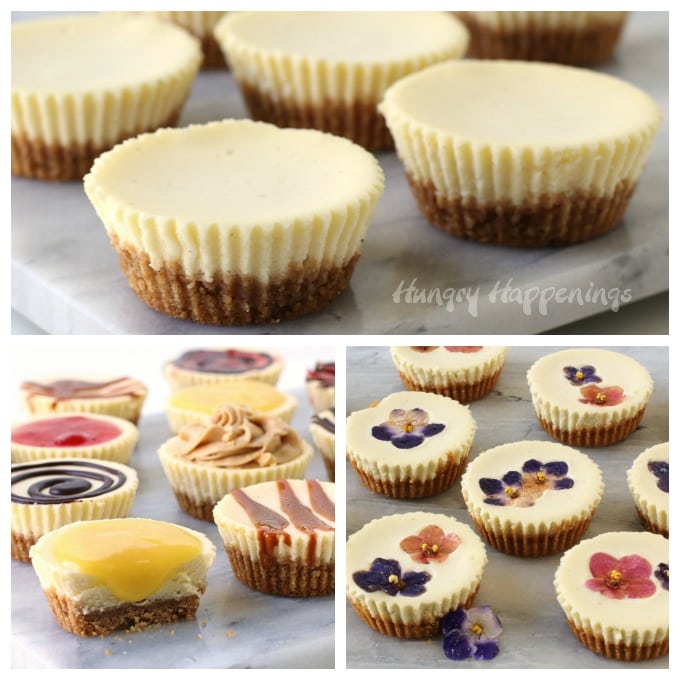
Mini Cheesecakes are made using a similar recipe but are baked in muffin tins. If you don't want to fuss with a water bath, then check out this recipe. These minis are easy to make and taste great.
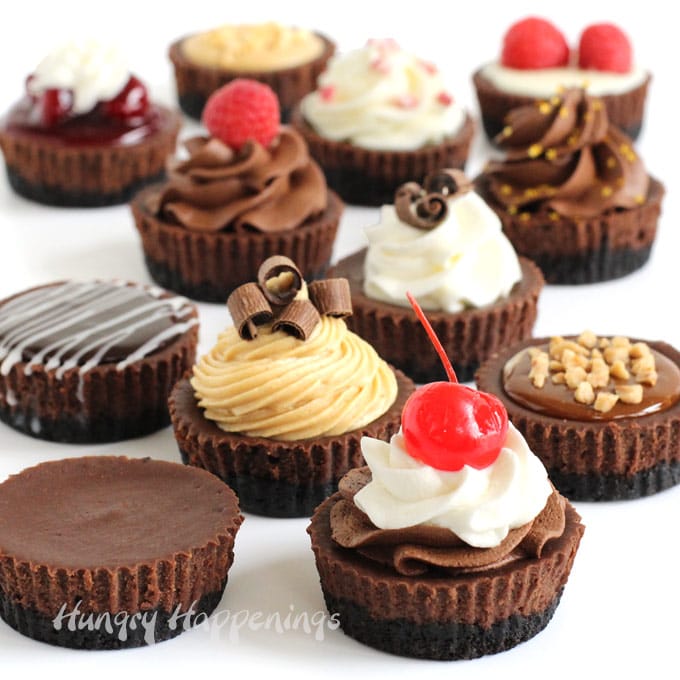
If vanilla isn't your thing, be sure to check out the recipe to make Mini Chocolate Cheesecakes.
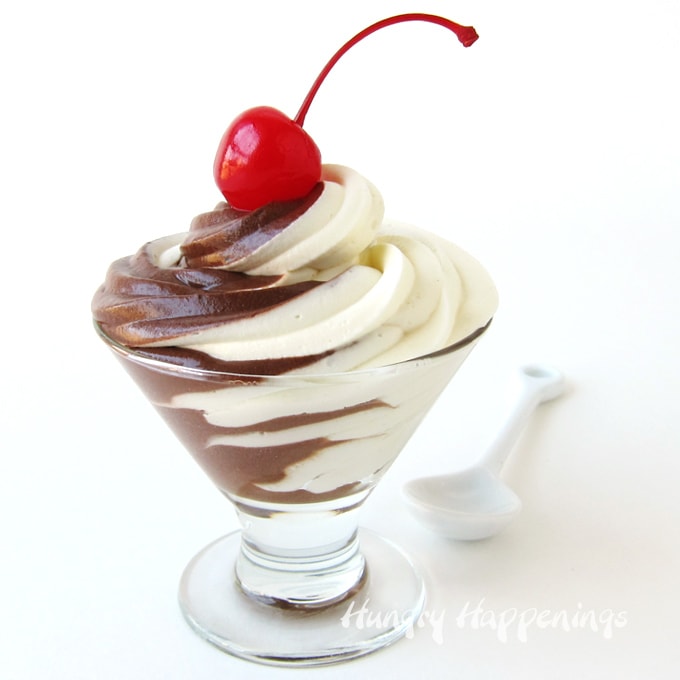
If you love the flavor of cheesecake and chocolate, be sure to check out the recipe to make this Chocolate and Cheesecake Swirled Mousse. It's delish!

Did you make this recipe or have a question about it? Let me know by leaving a comment below. Be sure to rate the recipe too. If you love the recipe, please give it a 5-star rating.

I love making fun food for parties and special occasions and sharing my creative ideas with you.
If you make this recipe and share it online be sure to link back to this post and use #hungryhappenings.
Thanks and have a sweet day! –
Beth
How Do You Make a Cheese Cake Creamier
Source: https://hungryhappenings.com/cheesecake-recipe/